The mere mention of "Nutella" often conjures images of creamy, chocolatey indulgence, a beloved spread enjoyed by countless people worldwide. From lazy Sunday mornings on toast to secret spoonfuls straight from the jar, it’s a taste that brings back childhood memories for many. However, a peek at the ingredient list of the popular store-bought version quickly reveals some less-than-ideal components: an abundance of refined sugar, palm oil, and milk powder, making it unsuitable for vegans and those seeking healthier, more ethically sourced options.
But what if you could recapture that irresistible chocolate-hazelnut magic without the guilt? What if you could create a spread that's not only dairy-free, refined sugar-free, and palm oil-free, but also packed with wholesome ingredients you can trust? The good news is, you absolutely can! Unleash your inner kitchen wizard and dive into the simple, rewarding world of diy homemade vegan nutella. With just five natural ingredients and about 30 minutes of your time, you can whip up a jar of rich, addictive, and genuinely healthier chocolate hazelnut butter that truly earns the title of "The Best Refined Sugar-Free Vegan Nutella."
Why Choose DIY Homemade Vegan Nutella Over Store-Bought?
The decision to make your own chocolate hazelnut spread goes beyond just a fun kitchen project; it's a conscious choice for health, ethics, and unparalleled flavour. Let's delve into why making your own is a superior alternative:
The Unwanted Truth About Commercial Nutella
- Excessive Sugar Content: Often, sugar is the first ingredient listed, meaning it constitutes the largest portion of the spread. This contributes to a high calorie count and a significant sugar rush without much nutritional benefit.
- Palm Oil Concerns: Palm oil is a cheap filler often linked to deforestation, habitat destruction, and unsustainable agricultural practices. Furthermore, it's high in saturated fat. Choosing a palm oil-free alternative is a win for both your health and the planet.
- Dairy Ingredients: Traditional Nutella contains skimmed milk powder, making it unsuitable for vegans, those with lactose intolerance, or dairy allergies.
- Artificial Additives: While not always present, processed foods can contain emulsifiers, flavourings, and preservatives that many prefer to avoid in their diet.
The Irresistible Benefits of Your Homemade Version
Crafting your own diy homemade vegan nutella puts you in complete control, transforming a guilty pleasure into a mindful indulgence:
- Refined Sugar-Free: By using natural sweeteners like maple syrup, you can enjoy the sweetness without the drawbacks of processed sugars. You can even adjust the level of sweetness to your personal preference.
- Palm Oil-Free and Vegan: Your homemade spread is inherently free of palm oil and dairy, making it an ethical and inclusive choice for everyone, including those following a vegan or paleo lifestyle.
- Wholesome, Natural Ingredients: You're using real, unprocessed foods – hazelnuts for healthy fats and protein, cacao powder for antioxidants, and coconut oil for a luxurious texture.
- Superior Flavour and Freshness: The taste of freshly roasted hazelnuts and high-quality cacao is simply unmatched. The flavour is richer, more nuanced, and free from the often artificial taste of commercial spreads.
- Customization Options: Want it sweeter? Less sweet? More chocolatey? A hint of sea salt? You decide! This allows for endless experimentation to tailor the spread perfectly to your palate.
While we won't claim this is a "health food" in the traditional sense – it's still a treat! – it is undoubtedly a much, much healthier and more conscientious option than anything you'll find on a supermarket shelf.
Essential Ingredients for Your Divine DIY Creation
The beauty of this diy homemade vegan nutella recipe lies in its simplicity and the power of a few key, high-quality ingredients. You only need five core components, plus a secret sixth for an extra flavour boost:
- Hazelnuts: The star of the show! Raw, unblanched hazelnuts are ideal as roasting them yourself brings out their deep, nutty flavour and helps release their natural oils, crucial for creating a smooth butter.
- Maple Syrup: Your natural sweetener of choice. Grade A or B maple syrup provides a delicate, earthy sweetness that complements the chocolate beautifully. Other options include agave nectar or even pitted dates (which might require a bit more blending and could alter the texture slightly).
- Cacao Powder (or Cocoa Powder): For that rich chocolate flavour. Raw cacao powder is preferred for its higher antioxidant content and intense, pure chocolate taste. However, unsweetened cocoa powder works perfectly well if that's what you have on hand.
- Coconut Oil: This acts as a superb emulsifier, helping to create a lusciously smooth, spreadable texture. It also adds a subtle richness and healthy fats to the mix.
- Vanilla Extract: A touch of pure vanilla extract elevates the chocolate and hazelnut notes, adding depth and warmth to the overall flavour profile. Don't skip this!
- A Pinch of Salt: Our secret weapon! Just a tiny pinch of fine sea salt dramatically enhances the chocolate flavour, balances the sweetness, and prevents the spread from tasting flat.
Pro Tip: For the best results, invest in good quality ingredients. Fresh hazelnuts and a high-grade cacao powder will make a noticeable difference in the final product.
The Simple Steps to Crafting Your Own DIY Homemade Vegan Nutella
You might be surprised at how straightforward the process is. If you can roast nuts and press a button on a food processor, you're halfway there! The entire journey from raw hazelnuts to a jar of rich, spreadable diy homemade vegan nutella is comprised of just a few crucial steps:
1. Roast the Hazelnuts to Perfection
This initial step is non-negotiable for flavour and texture. Spread your raw hazelnuts in a single layer on a baking sheet. Roast them in a preheated oven at 160ºC/320F (fan assisted) for approximately 8-10 minutes. Keep a close eye on them; you want them fragrant and slightly browned, but not burnt. Roasting not only deepens their nutty flavour but also loosens their skins and helps release their natural oils, which are vital for blending into a smooth butter.
2. Banish Those Skins (or Embrace Them!)
Once roasted, allow the hazelnuts to cool slightly. While still warm, pour them onto a clean kitchen towel. Gather the corners of the towel to create a pouch, then vigorously rub and scrunch the nuts within the towel. This friction will loosen and remove most of the papery skins. Some stubborn skins might cling, and that's perfectly fine! While removing more skins will result in a silkier, smoother spread, a few left behind won't compromise the delicious taste. For a super-smooth finish, some even use a hairdryer to blow off the loosened skins!
3. Transform Nuts into Luxurious Butter
Transfer the skinned (or mostly skinned) hazelnuts to a high-speed food processor. This is where the magic happens! Process the nuts, scraping down the sides occasionally. Initially, they'll become a coarse meal, then a clumpy paste. Patience is key here. Keep blending, and after several minutes (it can take 5-10 minutes depending on your machine), the natural oils will release, transforming the paste into a smooth, flowing hazelnut butter. It should be warm and almost liquid-like.
4. Combine and Conquer: The Final Blend
Once you have a wonderfully smooth hazelnut butter, add the remaining ingredients: maple syrup, cacao powder, melted coconut oil (if solid), vanilla extract, and that crucial pinch of salt. Continue processing until all ingredients are thoroughly combined and the spread is completely smooth and uniform in colour. Taste and adjust if necessary – perhaps a little more maple syrup for sweetness, or an extra pinch of salt to amplify the chocolate. You’ve just created your very own, incredibly delicious palm-oil free vegan nutella recipe!
Storage, Serving Suggestions, and Customization
Storage
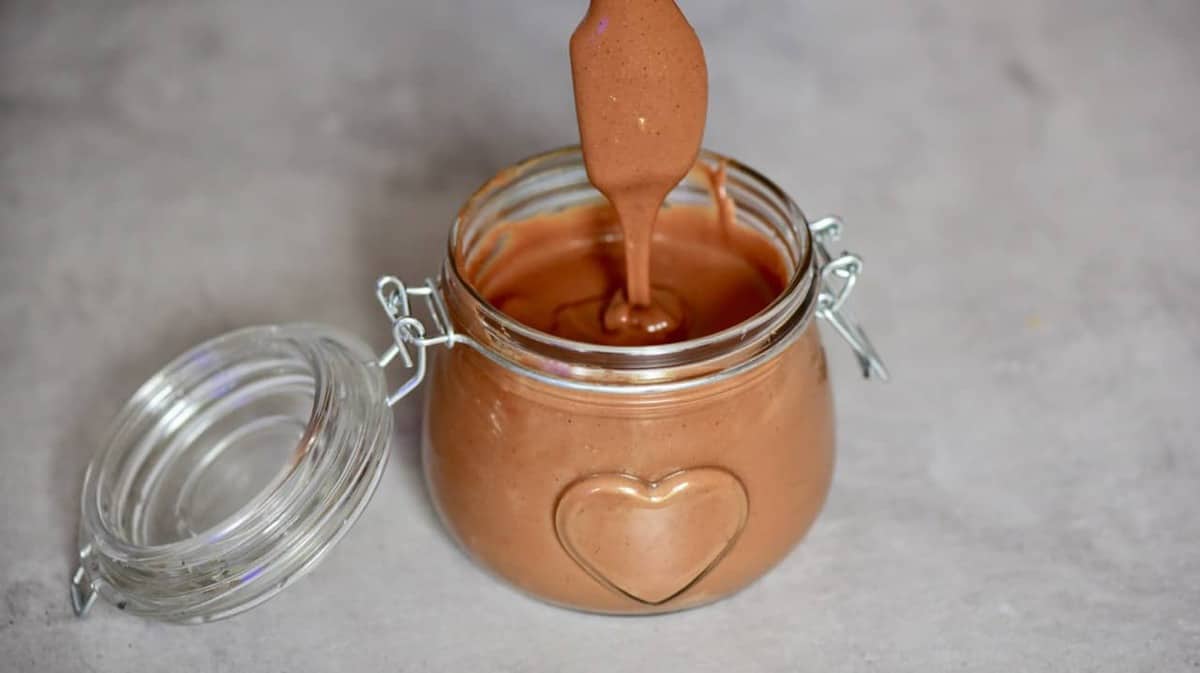
Transfer your freshly made diy homemade vegan nutella into a clean, airtight jar. Store it in a cool, dry place like your pantry for up to 2-3 weeks. Due to the coconut oil, the spread will firm up significantly if stored in the refrigerator. If you prefer a spreadable consistency after refrigeration, simply let it sit at room temperature for 30 minutes before serving, or gently warm it in a microwave for 10-15 seconds until softened.
Serving Suggestions
The possibilities are endless for enjoying this delectable spread:
- Spread generously on toast, bagels, or crumpets.
- Drizzle over pancakes, waffles, or French toast for a decadent breakfast.
- Use as a dip for fresh fruit like strawberries, bananas, or apple slices.
- Stir into oatmeal or yogurt for an added flavour boost.
- Blend into smoothies for a chocolatey, nutty treat.
- Incorporate into vegan baking recipes for brownies, cookies, or cakes.
- And, of course, the ultimate indulgence: a spoon straight from the jar (we won't tell!).
Customization Ideas
One of the greatest joys of making things from scratch is the ability to tailor them to your exact preferences:
- Spice It Up: Add a pinch of cinnamon, cardamom, or even a tiny dash of cayenne pepper for a subtle warmth or a hint of spice.
- Nutty Variations: While hazelnuts are traditional, try adding a handful of roasted almonds or cashews for a different flavour profile and even creamier texture.
- Extra Sweetness: If you prefer a richer, caramel-like sweetness, try adding a couple of softened, pitted Medjool dates along with the maple syrup.
- Salted Caramel Vibe: A sprinkle of flaky sea salt on top of your finished spread enhances the flavour and adds a gourmet touch.
Embrace the Delicious Difference
Whipping up your own diy homemade vegan nutella is more than just following a recipe; it's an empowering step towards healthier eating, ethical consumption, and rediscovering the joy of real, wholesome food. In just 30 minutes, you can transform simple ingredients into a rich, velvety, and utterly irresistible chocolate hazelnut spread that rivals, and dare we say surpasses, its store-bought counterpart. So, ditch the guilt, embrace the goodness, and prepare to fall in love with your homemade creation. Your taste buds, and your body, will thank you.
